
Decide what the sketch needs to answer
Start with your decision. Are you comparing two sofa positions, finding out why a cupboard is difficult to open or considering a new table? A room sketch can help you compare possibilities, but it is not a construction survey or a guarantee that furniture can be delivered through the building.
Use paper or the printable checklist, a pencil and a measuring tool you can use safely. Record measurements in one unit system throughout your sketch. Include the units beside every number; do not mix centimetres and inches without clearly converting them.
Draw and label the fixed room first
- Draw the approximate outline. It does not have to be to scale yet.
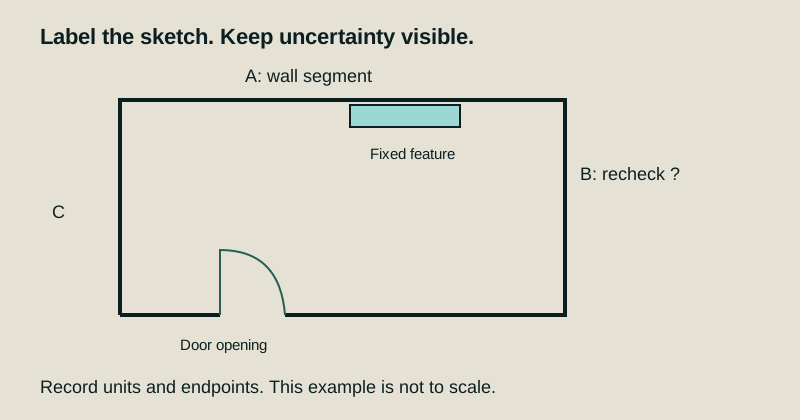
- Label walls or segments A, B, C and so on so that each measurement has a location.
- Mark doors, windows, alcoves, columns and other fixed features.
- Measure the relevant wall segments from clearly identified endpoints. Note whether you measured between finished surfaces or around an obstruction.
- Record projections such as radiators and skirting where they affect the proposed position. Mark outlets or vents that need to remain usable.
For an irregular room, break the outline into labeled segments. Do not assume opposite walls are identical or corners are square just because they look that way. If you cannot measure a part reliably, mark it as uncertain rather than filling in a guessed exact value.
Add openings and furniture in use
Mark which way each door opens. Note the space occupied by an open drawer, a pulled-out chair or a folding surface relevant to your decision. A furniture footprint drawn as a closed rectangle does not show all of its use.
Measure the furniture you plan to keep, including protruding parts that affect fit. Identify which side people approach and which parts move. For a possible purchase, check the manufacturer's actual dimensions and handling information rather than relying on a product photograph.
Delivery is a separate question: stairs, turns, doorways, lifts and packaging may matter even if the item would fit in the room. Confirm uncertain delivery requirements with the supplier.
Cross-check and keep uncertainty visible
Repeat a measurement that will determine your decision, preferably checking the same endpoints. Compare your sketch with the room: have you missed a door recess or counted a segment twice? If a repeated measurement differs, record both readings and investigate before choosing the more convenient one.
The diagram is a recording example, not a dimensioned floor plan. The question mark shows a measurement that has not been confirmed. A label such as “B: about 240 cm; recheck behind curtain” is more honest than an unexplained precise-looking number.
Use the sketch to compare, not to certify
Draw the proposed arrangement and trace the activities you want to improve. Check what becomes harder as well as what improves. Before committing to a purchase or permanent work, resolve the measurements on which that decision depends.
1 inch equals 2.54 cm; 1 foot equals 30.48 cm. A 240 cm measurement is approximately 94.5 inches, or 7 feet 10.5 inches. Keep the original measurement and label a converted value as approximate when rounded.
This guide does not prescribe universal clearances or certify a safe or accessible design. Obtain appropriate advice for building work or needs that require specialist assessment.